Step 1: Navigate the opening cube sequence
Perform multiple single taps to jump over ground spikes and blocks. The first three jumps are small, followed by a larger jump over a triple spike, then a medium jump.
Character transforms into a ship mode.
Complete walkthrough and strategy guide for Sand Loop Level 148. Watch the video tutorial and learn expert tips to beat this level.
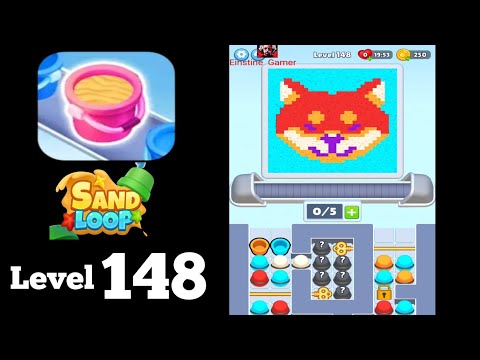
Watch this video walkthrough to learn how to beat Sand Loop Level 148. Follow the step-by-step solution.
Master Sand Loop Level 148 with our complete walkthrough. This medium level typically takes 3–5 min to complete. Find tips, video guides, and strategies for this puzzle level.
A fast-paced rhythm-based platformer level featuring frequent transitions between cube, ship, and ball modes, with gravity and size changes, all set within a sandy, desert-themed environment requiring precise timing.
| Time | Scene | Action | Common Error | Confidence |
|---|---|---|---|---|
| 00:01 | Level start; initial cube jumps | Player begins navigating the first cube section with multiple taps to jump over spikes and blocks. | 100% | |
| 00:03 | First ship section | Character transforms into a ship and flies through a relatively narrow tunnel, requiring continuous adjustments. | Crashing into ceiling or floor. | 90% |
| 00:07 | First ball mode with gravity changes | Character transforms into a ball, initiating a series of gravity flips by tapping at specific points to traverse obstacles. | Incorrect timing on gravity flips. | 90% |
| 00:10 | Complex ship section | Character enters a challenging ship sequence with very tight passages and varied obstacle placement, demanding precise hold-and-release mechanics. | Colliding with obstacles due to insufficient or excessive hold duration. | 100% |
| 00:13 | Mini cube (upside down) section | Character transitions to a small cube, upside down, requiring precise taps to jump over spikes while the gravity is inverted. | Misjudging jump distance and height. | 90% |
| 00:15 | Mini ship section | Character transforms into a small ship, navigating a dense field of spikes and blocks, often at high speed. | Crashing into hidden or fast-approaching obstacles. | 100% |
| 00:21 | Second ball mode with multiple gravity flips | Character re-enters ball mode, encountering a rapid succession of gravity flip rings that demand quick and accurate taps. | Missing consecutive gravity flip timings. | 100% |
| 00:26 | Final ship ascent | The character transforms into a ship for the final push, flying upwards through a series of blocks and decorations towards the end of the level. | Hitting the final set of blocks before the completion. | 90% |
| 00:29 | Level complete | The player successfully completes the level, achieving an A-Rank. | 100% |
Perform multiple single taps to jump over ground spikes and blocks. The first three jumps are small, followed by a larger jump over a triple spike, then a medium jump.
Character transforms into a ship mode.
Use short holds and releases to guide the ship through the initial narrow tunnel, avoiding touching the top or bottom.
Character transforms into a mini cube.
Execute small, precise taps for the mini cube jumps, then switch to the ball mode. In ball mode, tap twice rapidly to flip gravity and clear the obstacle, followed by another tap to flip back.
Character transforms into a ship.
Apply very controlled, short holds and quick releases to maneuver the ship through extremely tight passages and spike arrangements, often involving rapid up and down movements.
Character transforms into an upside-down mini cube.
Tap to jump over spikes in the inverted mini cube section. Immediately transition to mini ship, requiring continuous, small adjustments to fly through a densely packed series of obstacles.
Character transforms into a normal-sized cube.
Perform a series of standard cube jumps over various blocks and spikes. Upon entering ball mode, execute a rapid sequence of taps to flip gravity multiple times through a chain of rings.
Character transforms into a normal-sized cube.
Execute a final sequence of precise cube jumps over blocks. Upon transforming into a ship, hold the screen to ascend steadily, avoiding the last few blocks and exiting the level.
Level completion screen appears.
Misjudging jump or flight timing, leading to collision with spikes or blocks.
Fix: Focus on the rhythm of the level's music and practice specific segments to internalize the precise tap/hold durations required.
Evidence Time: N/A
Crashing the ship into the ceiling or floor, especially in tight corridors.
Fix: Use very short, controlled taps for ascending and rely on gravity for descending. Avoid long holds unless explicitly required for sustained flight.
Evidence Time: N/A
Failing to execute consecutive gravity flips in ball mode correctly.
Fix: Anticipate the gravity flip rings and tap precisely when the ball is centered over them. Some sections require quick double-taps.
Evidence Time: N/A
Getting overwhelmed by the rapid speed and mode changes.
Fix: Break the level down into smaller sections and master each transition individually. Practice without the intention of clearing the whole level, focusing only on specific difficult parts.
Evidence Time: N/A
Q: How can I improve my timing for this level?
A: Practice is key. Pay close attention to the level's music and visual cues. Many players find it helpful to try the level in practice mode to memorize the sequence of taps and holds without pressure.
Q: What are the most challenging sections in Sand Loop Level 22?
A: The complex ship maze around 00:10-00:13, the inverted mini cube and mini ship sequence around 00:13-00:18, and the multi-flip ball section around 00:21-00:23 are typically the most difficult due to tight spacing and rapid changes.
Q: Are there any hidden coins or secrets in this level?
A: The provided video focuses on a successful A-Rank run and does not show any attempts to collect hidden coins or reveal secrets. Therefore, based on observable content, it's not possible to confirm or deny their existence or location.
View Guide →
View Guide →
View Guide →
View Guide →
View Guide →
View Guide →
View Guide →
View Guide →
View Guide →

View Guide →
View Guide →
View Guide →
Share Your Experience
Community Comments (0)
No comments yet. Be the first to share your experience!